Showing posts with label how to. Show all posts

Thursday, March 1, 2012

Homemade coconut body butter recipe

homemade coconut body butter, body butter recipe, organic body butter,organic makeup, bio makeup,homemade makeup,coconut scented cream, how to,tutorial, homemade,diy, beauty diy,

Today I would like to share with you a quick beauty recipe to make a very good body butter. I discovered it a while ago and I've been a fan ever since. It's cheap, organic and biological because it's made just with water and dry coconut, it's quick because it takes only 5 minutes to make it and it's coconut scented (I love the scent of coconut). I use it everyday as hand cream and lip balm. It makes hands really soft. I suggest you to try it, you're gonna love it!

Oggi vorrei condividere con voi una veloce ricetta di bellezza per realizzare in casa un ottimo burro per il corpo. Il burro che otterrete è economico e biologico perchè costituito da farina di cocco ed acqua, è veloce perchè si realizza in 5 minuti, in più profuma di cocco. Io lo uso principalmente come crema per le mani e balsamo per le labbra. Rende le mani molto morbide. Provare per credere.


Buy dry coconut  at the grocery store, a bag is $1.5 and you'll make a ton of butter out of it.
Acquistate un sacchetto di farina di cocco al supermercato, con meno di un euro potrete realizzare una quantità incredibile di burro.
Versate 3 cucchiai di farina di cocco in un pentolino
Put enough water to cover it but not too much and blend it well
Aggiungete acqua fino a coprire il burro, mescolate bene e lasciate sul fuoco per 5 minuti
Filtrate il cocco con un colino
Aiutatevi con un cucchiaio (o uno schiaccia patate) per spremerlo bene
Oppure avvolgetelo in un tovagliolo e strizzatelo
Once the cocounut is completely drained you can toss it, the coconut butter is all into the liquid.
Una volta terminata questa operazione potete buttare via la farina di cocco che avete spremuto perchè ormai è esausta. Tenete il liquido però e mettetelo in frigo.

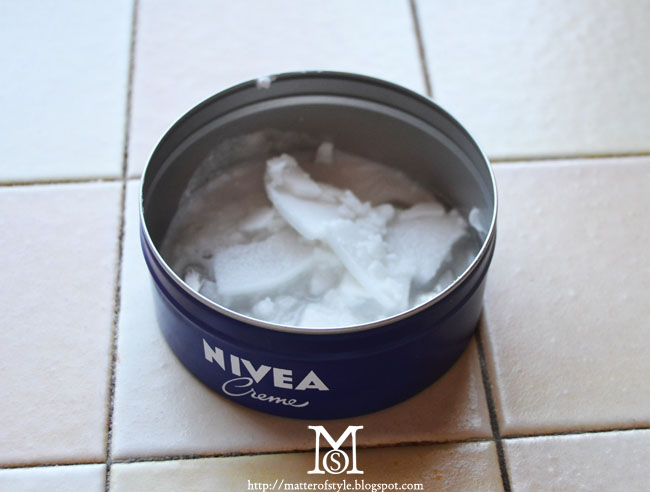
Use a spoon to pick up the butter and put it into a jar. Put the coconut water into a spray bottle and spray it over the body onto damp skin after bath.
In frigo il burro si solidificherà e potrete asportarlo con un cucchiaio. L'acqua di cocco rimasta liquida si può invece mettere in uno spruzzino ed usarla come acqua idratante per il corpo vaporizzandola sulla pelle ancora bagnata dopo la doccia. 

The coconut body butter will last 2 weeks if you keep it into the fridge, 1 week otherwise. The coconut water will last 1 week into the fridge. That is why this recipe is for a small quantity of butter but you can adjust the quantities according to your needs.
I found this recipe here.

To read more beauty tips click here: How to fix a broken eyeshadow

Il burro ha una data di scadenza: durerà 2 settimane tenendolo in frigo altrimenti una settimana. L'acqua di cocco durerà una settimana. Essendo un cosmetico organico deperisce più rapidamente di quelli con i conservanti, ecco perchè le quantità suggerite nella ricetta sono piccole. Potrete comunque aumentarle secondo la vostra necessità. 
Ho trovato questa ricetta su sai cosa ti spalmi?

Per leggere altri pratici consigli beauty cliccate qui: Come riparare un ombretto rotto

Sunday, February 19, 2012

Stella MCartney inspired cut out dress with wavy hem DIY

stella mccartney dress,dress diy,diy,fashion diy,how to,cut out dress,wavy hem,spring 2012stella mccartney dress,dress diy,diy,fashion diy,how to,cut out dress,wavy hem,spring 2012
stella mccartney dress,dress diy,diy,fashion diy,how to,cut out dress,wavy hem,spring 2012

Yesterday we talked about wavy hems and how they are trending this spring. I really appreciated how Stella MCartney incorporated curled hems in her spring 2012 collection. Today I'll show you how to diy a similar dress cutting out one you already own. I will also show you a crochet technique to make a cord I used to decorate the dress: it's called the romanian cord (or european macramè).

Start with a long sleeve dress. I made my dress from scratch because I had a very cute piece of fabric that was perfect for this project. The project is all about cutting out so a dress you already own will be fine.
Ready to start? Follow me after the jump.


stella mccartney dress,dress diy,diy,fashion diy,how to,cut out dress,wavy hem,spring 2012

I put my dress on my diy dress form (or just wear the dress). Highlighted in the pic you can see the part of the fabric you have to cut it out. Start cutting on the shoulders, 1 inch far from the neckline, cut off the cleavage untill the armhole. Also cut off one sleeve.

stella mccartney dress,dress diy,diy,fashion diy,how to,cut out dress,wavy hem,spring 2012
This is how the neckline looks once cut
stella mccartney dress,dress diy,diy,fashion diy,how to,cut out dress,wavy hem,spring 2012

Now let's cut the wavy hem.

stella mccartney dress,dress diy,diy,fashion diy,how to,cut out dress,wavy hem,spring 2012

stella mccartney dress,dress diy,diy,fashion diy,how to,cut out dress,wavy hem,spring 2012
This is how the dress should look once cut
 Now let's decorate it! Stella MCartney's dress is heavy embroidered along the neckline and along the hem. To imitate this embroidery I made a few meters of crochet cord (but you can also buy a cord or a cute trim). This cord is called romanian cord (or european macramè) and it's easy to do if you know the basics of crochet, click on this link to learn how to do the romanian cord.

stella mccartney dress,dress diy,diy,fashion diy,how to,cut out dress,wavy hem,spring 2012
this is how the romanian cord looks like
stella mccartney dress,dress diy,diy,fashion diy,how to,cut out dress,wavy hem,spring 2012
I pinned the cord over the dress then I sewed it
stella mccartney dress,dress diy,diy,fashion diy,how to,cut out dress,wavy hem,spring 2012
And this is how the embroidery looks like when done.

stella mccartney dress,dress diy,diy,fashion diy,how to,cut out dress,wavy hem,spring 2012

And this is how the dress looks once finished.
I hope you liked this tutorial, happy Sunday!
See other diy cloths here.

Monday, February 6, 2012

How to stretch tight shoes using ice

allargare le scarpe, come allargare scarpe, DIY, enlarge shoes, ghiaccio, how to, how to enlarge shoes, how to stretch your shoes, ice, ice mold, MY DIY, stetch the shoes with ice
The shoe rehab: from an impulse buy you're going to regret (they're too tight!!) to a nice addition to your wardrobe
allargare le scarpe, come allargare scarpe, DIY, enlarge shoes, ghiaccio, how to, how to enlarge shoes, how to stretch your shoes, ice, ice mold, MY DIY, stetch the shoes with ice
be sure there are no holes into the bag first!
allargare le scarpe, come allargare scarpe, DIY, enlarge shoes, ghiaccio, how to, how to enlarge shoes, how to stretch your shoes, ice, ice mold, MY DIY, stetch the shoes with ice
you can either fill only the toe if they're too tight on the feet or fill them entirely if they're also short
DON'T FORGET TO SEAL THE PLASTIC BAG WITH AN ELASTIC BAND
allargare le scarpe, come allargare scarpe, DIY, enlarge shoes, ghiaccio, how to, how to enlarge shoes, how to stretch your shoes, ice, ice mold, MY DIY, stetch the shoes with ice
Use a plastic bag to cover your shoes to ensure the hygiene of your refrigerator. When you take them out of the refrigerator, wait a while until ice melts a bit and then remove your frozen mold

I'm stuck indoor due an extraordinary snowfall and I thought it was just the perfect time to show you this clever technique to stretch shoes just using cold.
Have you ever bought shoes that were too tight hoping to find a way to make them fit (see impulse buy, love at first sight, insane low prices...etc etc)?
I bought these shoes a while back and never worn them because they're too tight and when I say too tight I really mean it. I tried to use a shoe stretcher spray but these needed to be stretched a lot so I tried to take advantage of the cold and now I can proudly say that these shoes fit!
If your shoes are really small repeat the process a couple of times.
I read this technique for the first time here.


Sono bloccata in casa a causa della straordinaria nevicata che nei giorni scorsi si è abbattuta sulla nostra penisola e ho pensato di condividere con voi questa tecnica per allargare le scarpe usando il ghiaccio. Se anche voi  siete in casa senza far niente approfittate del freddo per allargare quel paio di scarpe che ci ha conquistato in negozio e non abbiamo potuto far a meno di comprare rassicurate dal consiglio del commesso che ci aveva assicurato che portandole un po' si sarebbero allargate (ma quando mai!).
La storia di queste scarpe è simile: amore a prima vista, saldo irrinunciabile, finite nell'armadio per dimenticare i senzi di colpa di una spesa inutile. Grazie a questa tecnica invece le scarpe sono state riabilitate con successo e potranno essere sfoggiate non appena potremo sfilarci gli stivaletti da neve. La tecnica è semplice: inserite una busta di plastica nelle scarpe, riempite la punta del piede d'acqua (o tutta la scarpa se oltre che stretta è anche corta), chiudete la busta con un elastico, infilate tutto in un'altra busta di plastica e inserite il tutto nel congelatore per una notte. La mattina seguente scongelate gli stivaletti e infilateli: rimarrete sorprese!
Ho scoperto questa tecnica qui.

Monday, January 30, 2012

Valentine's day heart nails tutorial

valentine's day,valentine's day nails,heart nails, valentine's day diy,fashion diy
avrete bisogno di: occhielli salvabuchi o in alternativa  forbici e scotch carta, smalto

APPLY A COAT OF RED NAIL POLISH

Applicate uno strato di smalto rosso
valentine's day,valentine's day nails,heart nails, valentine's day diy,fashion diy
click onto the image to enlarge it
cliccate sull'immagine per ingrandirla
Sovrapponete gli occhielli salvabuchi sull'unghia (in alternativa ritagliate 20 cerchietti di scotch) in modo da ricreare la forma del cuore. Applicate uno strato di smalto bianco. Aspettate che lo smalto asciughi e rimuovete i cerchietti.


Here's a quick tutorial on how to make the Valentine's day nails. The idea is to overlap reinforcement rings to create the heart shape. If you don't have them you can easily cut out small circles out of paper scotch.


Ecco un veloce tutorial su come realizzare la manicure perfetta per S. Valentino. L'idea è quella di utilizzare gli occhielli salvabuchi per realizzare la forma del cuore.

Thursday, January 26, 2012

How to dip - Dye your hair

shatush,dip dye,hair, dip dye hair, ombrè hair, shaded hair,how to make shaded hair,hair at home, how to, neon hair, color bug, DIY
Ombrè hair, shaded brighter hair at the end with darker roots


Watch how to DIY  dip-dye hair
shatush,dip dye,hair, dip dye hair, ombrè hair, shaded hair,how to make shaded hair,hair at home, how to, neon hair, color bug, DIY
Thakoon show

Kevin Murphy color bug

Shatush or dip dye, these are the names used to call ombrè hair: brighter hair at the ends with darker roots. Years ago those hair, with roots exposed would have been messy but not now. The shaded hair are fashionable and allow brunettes to bright up their hairstyle. How do we make it at home? Watch the video and discover the technique. If you've been following trends lately you may know that neon shaded hair were hot last spring. Things change fast nowadays and if you had to  "ruin" (or at least damage) your hair to obtain that look last spring, this season you'll have a brand easy, pain free product to get it. It has been used in Thakoon show to color model hair. It's called Color bug and it's a powder, you only have to rub it on a wisp and hair are colored and it goes away with a shampoo.
Update: you can find color bug here: color bug

Qualche anno fa, quei capelli con la ricrescita in vista, sarebbero stati considerati disordinati ma non oggi. Oggi lo shatush,così si chiama, è di moda e permette alle more di illuminare il colore schiarendo solo le punte. Come si realizza? Guardate il video per scoprire la tecnica. La scorsa primavera, seguendo il trend di stagione, i capelli si sono accesi di colori neon. Se un anno fa dovevamo danneggiare i nostri capelli per ottenere quest'effetto, quest'anno possiamo provare un nuovo prodotto. Si chiama color bug ed è una polvere che si strofina sulle punte e i capelli sono colorati: solo per una notte però, il colore verrà via con lo shampo. Potrete cambiare colore secondo l'umore.
Aggiornamento: potete trovare color bug a questo link : color bug

Friday, January 20, 2012

Galaxy nail manicure DIY

galaxy nails,nebula nails,diy nails,diy,how to,tutorial,nails

Today I made this galaxy manicure using only one key item: a sponge! See how I made it!

Ho realizzato questa manicure "spaziale" utilizzando un oggetto molto comune: una spugna! Ecco come utilizzarla!


You can choose  any colour combination you want, only be sure to have a white and a glittered nail polish
Scegliete la combinazione di colori che preferite poi aggiungete uno smalto bianco e uno glitterato
galaxy nails,nebula nails,diy nails,diy,how to,tutorial,nails
 Spennellate la spugna con lo smalto e applicate il colore sulle unghie in modo casuale
galaxy nails,nebula nails,diy nails,diy,how to,tutorial,nails
Ripetete il procedimento con altri colori
Con uno spillo disegnate dei puntini bianchi (le stelle) e terminate stendendo uno strato di smalto glitterato

Tuesday, December 27, 2011

Make a jewelry holder with a box of chocolates

how make jewelry holder,jewelry holder,chocolates box,diy


This is not properly a tutorial it's more a suggestion on how to recycle a box of chocolates turning it into a rings holder. The tough part comes first: you and your friends have to eat all the chocolates then you can insert all your fancy rings into the box so they are clearly on display and you can quickly choose between them.

Quello di oggi non è propriamente un tutorial è più un suggerimento su come riciclare una scatola di cioccolatini trasformandola in un porta gioielli. La parte più difficile sarà sicuramente consumare i cioccolatini ma con l'aiuto di qualche amico ce la potete fare; poi andrete a riempire la scatola con i vostri anelli o anche orecchini così saranno esposti in bella vista e potrete scegliere rapidamente quali indossare.

how make jewelry holder,jewelry holder,chocolates box,diy

Friday, December 2, 2011

How to make earrings with buttons

I needed a pair of earrings to wear with my lion bracelet so I made these, you'll find the tutorial below, I hope you'll like it!

Ho creato questi orecchini da indossare con il mio bracciale animalier, troverete il tutorial di seguito, spero vi piaccia!


you'll need:
2 gold buttons
2 earrings hooks
2 clamps
a pincher
1 meter of cobra chain
gold metallic wire

Vi servono:
2 bottoni dorati
2 ganci per orecchini
2 morse
2 cerchietti di filo metallico
una pinza
1 metro di catenella cobra
filo metallico dorato

 Wrap the wire around the button then make two loops 

Avvolgete il filo metallico intorno al bottone e formate due gancetti 
Using scissors cut the cobra chain in pieces of the same lenght

Usando le forbici tagliate la catenella in segmenti della stessa lunghezza 

Block the chain pieces squeezing the clamp with the pincher

Usando la pinza schiacciate la morsa sulle catenelle

Connect the button to the clamp and to the earring hook with two jump rings.
Connettete il bottone alla morsa e al gancetto per orecchini utilizzando due cerchietti di filo metallico