Showing posts with label refashion. Show all posts

Thursday, February 23, 2012

DIY idea: Acne leather cut out skirt

acne,diy, fashion DIY,  skirt diy, diy leather skirt,cut out skirt, no sew, refashion, spring 2012,leather diy,acne s/s 2012
Acne spring 2012

acne,diy, fashion DIY,  skirt diy, diy leather skirt,cut out skirt, no sew, refashion, spring 2012,leather diy,acne s/s 2012
Acne spring 2012
It's an unusual leather skirt the one designed by Acne for spring summer 2012.  It can be made just cutting out star shapes from your leather skirt and no sewing is required. That's why leather is a fantastic diy material: it does not rip off!

E' una gonna originale quella disegnata da Acne per la primavera 2012. Può essere realizzata ritagliando delle stelle dalla vostra gonna in pelle. Non sarà necessario cucire nulla perchè la pelle non sfila e questo la rende una perfetta materia prima per i nostri fashion diy.

Saturday, December 10, 2011

The guide to DIY your party dress using scissors

Add drama to a maxi dress cutting out a rectangle from the side to obtain the Zara dress that is now in shops (pic on the left) or cut a rectangle from the front to obtain a tail dress (pic on the right)

Otterrete un vestito scenico a partire da un abito lungo ritagliando un rettangolo dal lato, ottenendo così l'abito di Natale di Zara (foto a sinistra) o tagliando un rettangolo davanti ottenendo così un abito con la coda (foto a destra)

 
just a vertical cut is needed to make a sexy slit dress or skirt

un solo taglio verticale vi permetterà di ottenere un abito con lo spacco


strategic cuts to make a new neckline or to show a flat stomach and a tiny waist

esempi di tagli strategici per ottenere nuove scollature o per mostrare uno stomaco tonico e una la vita stretta


We all need a new dress for the party season but why buy it when we can diy it?
This is the guide to diy a new dress on a budget just using scissors, no extra money! The game is easy, take a dress you already own, it can be a little black dress or a maxi dress and make some strategic cuts to make it brand new. 

Abbiamo tutte bisogno di un vestito nuovo per le feste,giusto? Mai come quest'anno però i cordoni della borsa sono tirati, perchè comprare un abito nuovo quando possiamo rimodernarne uno che già abbiamo? 
In questo post troverete dei suggerimenti per rinnovare un abito usando soltanto le forbici! Il gioco è semplice! Basterà prendere un abito qualunque, dal tubino all'abito abito lungo o una maxi gonna e fare dei tagli strategici che lo renderanno unico.

Saturday, October 29, 2011

Cut out shirt tutorial


Here's the shirt tutorial. I took a real man shirt and then I pinched and pinned it around the waist to make it more fitted. You can choose any shirt and then follow the 3 steps to cut it out.

Come promesso ecco il tutorial per realizzare la camicia con inserti in tulle. Io ho traformato una vera camicia da uomo e ho creato due pence sul davanti per renderla più avvitata. Voi scegliete la camicia che più preferite e seguite i 3 step per trasformarla.


Wear you shirt and mark out with a pin where you want the see throught part to begin. Lay down your shirt and make a loose stitched  line that will help you to cut straight.

Indossate la camicia e appuntate uno spillo sul davanti per segnare il punto da cui iniziare a tagliare. Partendo da lì fate un'impuntura da parte a parte che vi aiuterà a tagliare dritto.

 Cut the shirt : start from the front, go around the shoulder and down to the botton line. Leave 1 cm of fabric around the edge and then fold that edge to obtain a neat border.

Tagliate la camicia: cominciate dal davanti, proseguite intorno alla spalla e poi tornate giù intorno la linea dei bottoni. Ricordatevi di lasciare un 1 cm di stoffa intorno all'area tagliata. In un secondo momento piegate quel bordo ottenendo così un orlo ben rifinito.


Reverse the shirt.
Take your light weighted tulle and pin it over the edge of the cut part.
The good thing is that you don't need any pattern, just pin the tulle on and pay attention that the tulle is well stretched out.
Now sew the tulle on the shirt, cut the excess tulle around the edge and you've done!


Mettete la camicia a rovescio.
Prendete un tulle molto leggero e appuntatelo con degli spilli sulla parte tagliata.
Non vi servirà alcun modello fate solo attenzione che il tulle sia ben steso così non farà pieghe.
Cucite il tulle sulla camicia e tagliate quello  in eccesso ai bordi e avete finito!

Tuesday, August 30, 2011

A fancy new hat for an old lamp


This lamp lost its head a few years ago,today I wanted to try to give it a new life and place it in a  romantic themed room with a pink palette.


the old lamp without its hat: its body looks just like a stem

I bought a fake flower
I disassemled it
widened the hole at the center
inserted the petals into the disassembled body of the lamp
I cut some leaf shaped pieces of paper
and glued them onto the bottom of the flower
I put the light back on and the lamp refashion is done.
What do you think of the result?

Monday, July 11, 2011

Versace dress DIY: the making

 The basic shape of the dress can be obtained in a number of ways, an easy one can be to use a dress you own (with no stretch) and fits fine as a guideline. If you choose to do this remember to cut the front and the back of the dress leaving enought fabric around the borders (seam allowance) to adjust the fit.
The back of the dress arrives till the armpit.

Ci sono molti modi per ottenere il vestito base. Uno di questi può essere quello di utilizzare come modello un vestito semplice che già avete. Se decidete di tagliare il davanti e il dietro del vestito seguendo questo metodo ricordare di lasciare abbastanza stoffa ai bordi per poter fare delle modifiche quando proverete il vestito.
Il dietro del vestito è stato tagliato per arrivare sotto l'ascella.
I've sewed the front and the back of the dress together.
 This is what i've done to obtain the neckline:
you have to cut a curved piece of fabric
i've used a rope to define the neckline on the dress and around the neck
i've traced this curve over a piece of paper and then adjusted the width


Dopo avere cucito il davanti e il dietro del vestito questo è il procedimento per fare lo scollo:
ho utilizzato una corda per segnare il percorso della stoffa sul davanti del vestito fin dietro al collo
ho ricalcato questa linea su un pezzo di carta e poi ho aggiustato la larghezza del pezzo.
i've cut two curved pieces of satin fabric and i've stitched them together
then i've turned the piece over and pressed it with the iron to make the seam flat
then i've cut the excess border of the dress and inserted the satin neckline into the fluffy fabric

Ho tagliato due pezzi curvi di raso e li ho cuciti insieme da un lato.
 Li ho voltati e ho schiacciato la cucitura con il ferro da stiro
Ho poi tagliato l'eccesso di stoffa dal vestito e ho inserito il bordo in raso.
I've then sewed the satin onto the fluffy fabric keeping the seams in the inside
i've finished pressing the satin with the iron
The band on the back is a lot easier, it's just a rectangular piece of fabric.

Ho cucito il bordo sul vestito lasciando le cuciture all'interno e ho finito schiacciando tutto con il ferro da stiro.
Lo stesso procedimento è stato eseguito per la fascia sul retro del vestito tagliando un pezzo rettangolare di raso.


Saturday, July 9, 2011

Versace dress DIY


 when the dress has a complicated neckline a necklace can be distracting but you can make it swing on the back
quando un vestito ha un scollo importante una collana può essere di troppo, allora perchè non farla dondolare sulla schiena?

 DIY dress and bag
H&M belt and ring
ASOS necklace 
Atmosphere shoes


 the inspiration

This is the dress i made inspired by the feathered Versace one. Its shape is basic, i put all the effort in making the necklice with satin fabric. I'll show you how to make a band of  fabric that turn. Meanwhile what do you think of the dress?

Questo è il vestito che ho realizzato ispirandomi a quello di piume di Versace. Il modello base è semplice,la difficoltà sta nello scollo fatto in raso. Vi mostrerò come ho realizzato la striscia di stoffa "che gira" dietro al collo. Nel frattempo che ne pensate del vestito? 
SEE THE MAKING

Monday, July 4, 2011

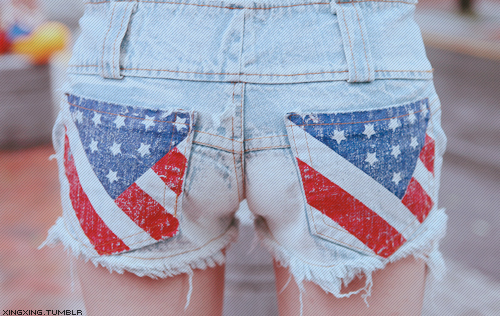
Fashion DIY ideas starring the american flag


Today for the 4th of July anniversary we can craft something inspired by the american flag! I have to admit that both the american flag and the UK one are very fashionable,it will be too difficult to think dresses and accessories based on the italian flag: who thought that bright green and red could go along together? It's so obivious that our flag wasn't designed by a woman or a gay man,now i understand why men always choose blue and hardly move from that!
What diy projects we can do with the american flag? here's some ideas:

 some pieces of the flag cut and sewn over a pair of trousers


 the flag painted over a piece of cloth with fabric colors (available even as drawing pen)

 flag nails

Sewing lovers who may want to craft more difficult projects can use the flag as a fabric to craft tote bags or even shirts and blouses.


these last two pics are from tthe 2010 Zanotti collection "American flag",aren't these shoes amazing? I really want to try to diy them.

DIY idea: cut out details


 Versus Versace dress

Cut out dresses can be tricky: if we don't have a perfect slim body (who has it anyway) cut out details can be windows over defects or "soft" areas of the body (do you like it? soft areas doesn't sounds so self-esteem destructive as rolls of fat,isn't it?). This Versus dress has a brilliant design,the cut out detail is on the slimmest part of the bust and it's a sexy detail without reveal too much,definitely something we can copy over a lbd!


I vestiti con scorci sulla pelle nuda sono sicuramente sexy ma con un corpo non perfettamente magro (alzi la mano chi ha un corpo perfetto!) possono diventare pericolosi da indossare, chi vuole un vestito con vista sulle morbidezze?(morbidezze vi piace? sicuramente meno brusco di rotoli di grasso). Questo vestito ha un design geniale! L'oblo è aperto sulla parte più magra del busto, è un dettaglio che rende il vestito sexy senza mostrare nulla,sicuramente un dettaglio da copiare per rinnovare un tubino nero!

Monday, June 27, 2011

DIY idea: lace dresses

Dolce&Gabbana lace dress
lace dresses you can find at Asos just click on the images


 Since i put my eyes on Dolce&Gabbana spring 2011collection i fell in love with those cute lace dresses. Perfect for summer (worn with a sunkissed skin) the lace dress is a classic in a romantic,chic wardrobe. Spring crochet magazines are filled with patterns to make one of these but crafting one takes time and summer is already here! Lace fabrics can be expensive so a cheap alernative can be to use lace curtains or embroidered tablecloths as fabric. Don't even think to touch your grandma tablecloths embroidered with love (i know that grannies don't do this anymore, they wear miniskirts and botox!),have a look in your local market instead i'm sure you'll find what you're looking for.

Per l'estate Dolce&Gabbana hanno declinato il vestito in pizzo in tante romantiche versioni. Perfetto per la stagione estiva, indossato sulla pelle dorata, il vestito in pizzo è un classico. Le riviste di uncinetto sono piene di schemi e proposte ma realizzarne uno richiede tempo e l'estate è già qui! Le stoffe di pizzo possono essere costose e una alternativa meno costosa possono essere tende in pizzo e le tovaglie ricamate usate come stoffa. Per carità non tagliate le tovaglie della nonna ricamate a mano con amore (lo so che oggi le nonne indossano minigonne e botox),cercate invece nei mercati locali,sono sicura che troverete quello che cercate.

Wednesday, June 1, 2011

DIY idea: reclycled paper earrings


How cute are these jewels made of reclycled materials! They come from Rebekah’s ‘The Pretties’ Cargoh shop. They're very easy to do:only few pages from books or magazines are needed. Cut some strips from your pages and then slice the paper. Now roll the strips to obtain a tassel or open the fringes to make a nice flower! Glue the embellish on the base of a ring or add hooks to obtain an unconvetional pair of earrings!


Guardate che carini questi gioielli fatti di carta riciclata! Sono in vendita qui. Sono d'effetto e molto semplici da realizzare. Avrete bisogno solo di alcuni fogli di carta per realizzarli presi da un libro o da qualche rivista. Tagliatene delle striscie e poi sfrangiateli. Arrotolate e incollate poi la striscia per ottenere nappine o aprite le frangie per ottenere dei bei fiori. Infine incollate l'ornamento sulla base di un anello o attaccateci dei gancetti per realizzare gli orecchini!